Installing Migration Manager
Although Migration Manager is still supported, as of DSM 2022.2, its functionality has been replaced with Ivanti Workspace Control Core Edition. For details, see the For details, see the Ivanti Workspace Control Core Edition Quick Start Guide (PDF).
Install Ivanti Migration Manager from the Ivanti DSM DVD. Keep your license file available during the process.
1.Create a directory named Migrate7 in the DSM share.
2.Start the setup on a computer where you can access the DSM share. On the main menu, select Install Ivanti DSM first and then Install Ivanti Migration Manager.
3.Select "\\<depot>\\<DSM share>\\<Migrate7>\\" as installation directory. If you use this directory, the Update Manager distributes the program files automatically to the depots in your DSM environment.
4.Start the Update Manager. Update the Update Packages even if they seem to be current. Run the Update Manager so that all depots are updated. A BLS update is not required if you are only installing the Migration Manager without running a compete DSM update.
5.Create a new directory in the root of the DSM share where you want to store the license file.
The Migration Manager modifies the license file each time it restores the backup and creates additional files for the license check.
Note that the user account of the DSM Runtime Service must have write access to this directory.
1.Start the MigrationManager.exe from the installation directory or by double-clicking the desktop shortcut.
This opens the Migration Manager user interface.

2.Configure the Migration Manager according to your requirements. You can specify the data you want to back up in the user interface of the Migration Manager directly, independent of Ivanti DSM.
Configuring Migration Manager
After having started the Migration Manager, it has to be configured first.
You can configure which data you want Migration Manger to back up and restore in the Migration Manager's user interface.
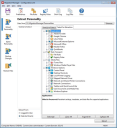
1.Open the Migration Manager user interface. The Extract Personality view pops up automatically.
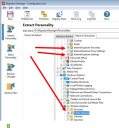
2.Open the Select for Extraction tab. Migration Manager displays the available applications and options. Ignore the User(s) to Extract tab because the users are selected in DSM.
3.Select the Applications and Windows options you want to back up, for example the Internet Explorer settings and Favorites or the directory options. If you want to back up additional directories or registry settings, select File Rules or Registry Rules as well. You can specify the details in the following steps.
Migration Manager ignores applications, that are not installed, in the backup process. Therefore you can select all of the listed applications. Applications you don't want to back up can be removed from the list.
With Migration Manager you can also create your own applications using the Migration Manager Content Builder. For further information, contact the Support.
4.Select Edit > Preferences from the menu bar to specify the basic rules that apply for backing up (Extraction Policies) and restoring (Inject Policies) user data (e.g. the rule to ignore the Temp directory).
5.Optionally, you can select Edit > File Rules... to back up or exclude specific file types or directories. Select Edit > Registry Rules... if you want to specify similar rules for certain registry entries. See the Migration Manager User's Guide for more details.
6.Select File > Select Data Store Location... to specify where to store the user data you just backed up. To automate data backup and restore with DSM, you must specify a path any of the associated computers can reach at any time, for example an additional share on the depot server.
7.Select File > Save as... to save your backup settings. Save the settings in the <Server>\DSM$\Extern$\MigrationManager\Config.xml file because the predefined Migration Manager packages in DSM automatically use this name and path.
Migration Manager saves your backup settings in the specified file.
If you need different configurations, save them using different names. When you assign backup packages in DSM, you can use a (default) variable to customize the name.
8.To finish the configuration of the Migration Manager, note the following:
•Copy the license file to the directory you created for storing the license files when you installed the Migration Manager. This path must be added to the configuration file!
•To add the path, open the config.xml in the extern$ directory in any editor.
Add the following section under <Profile> with the license directory location:
<Section name="License Store">
<Setting key="License Store Location">\\<DSM_share>\MigrationManagerLicense\</Setting></Section